
Who would be more perfect for this metallic effect other than the Iron Man actor, Robert Downey Jr. Take a look at the 'before' and 'after' image below...so you'll have an idea of what I'm talking about.

1. Naturally, you should start by opening your image in Photoshop.
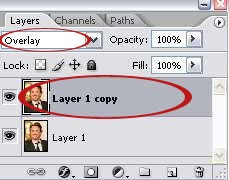
2. Next, duplicate the image. Set the duplicate image layer to Overlay.
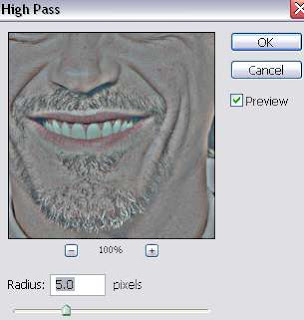
3. With the duplicate image layer selected, go to Filter > Other > High Pass. Our goal here is to sharpen the image a little bit, so you can see some details on the skin tone. If you already have a high resolution image, no need to set the radius too high. Mine is set to 5.
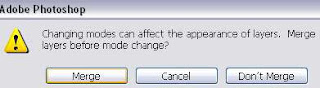
4. Now go to Image > Mode > Grayscale. If a message appear asking you to merge the layer, don't panic, just click 'Merge'.
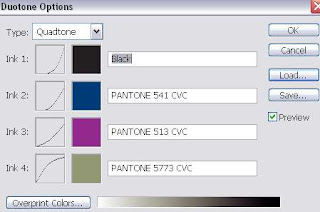
5. Next, go to Image > Mode > Duotone. Select Quadtone on the Type dropdown menu. Then, click the 'Load' button on the right.
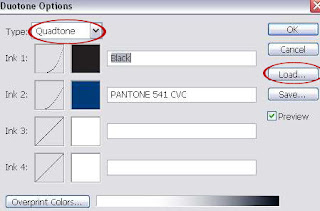
A window will open, select PANTONE(R) QUADTONES folder. And select the file Bl 541 513 5773 and click Load. You'll have something like below and click OK.
6. Now, change the mode back to RGB. Go to Image > Mode > RGB Color.
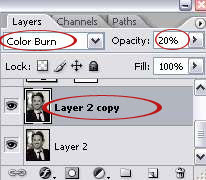
7. Duplicate the image. And set the duplicate layer to 'Color Burn'. Set the opacity to 20%.
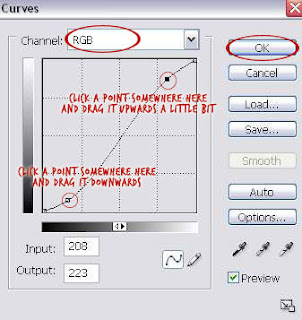
8. We're gonna add some adjustment layers to amplify the effect. Go to Layer > New Adjustment Layer > Curves. Make an S-shape curve like the image below. The steep of your curve is up to you, whatever looks good on your image.
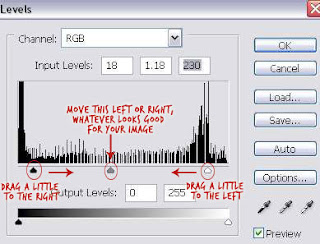
9. Now go to Layer > New Adjustment Layer > Level. Adjust the level as follows.
And we're done. You got yourself one explosive metallic portrait.

Tags:
1 comments: on "Metallic Toning Effect on your Portrait | Metallic Toning Effect Tutorial"
Cool
Post a Comment