Custom Search

Tuesday, March 16, 2010

Illustrator - How To Make It With Mesh

Sometimes I think “what could I create next?”. Why not start with just 4 lines and 5 color swatches and see from there? Use the tools at hand and see where it ends up. Surprising results happen when you do. Here is where I ended up…

The basics

Create 4 lines

Create 4 vertical lines using the Rectangle tool. I used the Direct Selection tool (white arrow) and hold down the Shift and Alt/Option key to duplicate the 1st one to create the other 3 lines. While doing this it's best to turn on Smart Guides (View > Smart Guides or hit Command/Ctrl + U).


Add color

For the colors I browsed through my Kuler colors collection, saved the swatches of my choice on the desktop and then I've loaded them in Illustrator. To do this go to the Swatches palette's menu and choose Open Swatch Library and Other Library.... Browse to the palette you've saved, select it and hit the open button. Now click on the folder with the swatches in the new palette that appears on your screen. Now they will be added to your document's Swatches palette. Give each line a different color using your swatches. If you like, you could add a subtle linear gradient effect. That is what I did. I also decided to use my fifth swatch for the background of my creation using a separate layer (which I locked each time I needed to when I was editing my lines shape).

Make with Mesh

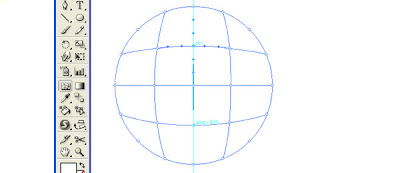
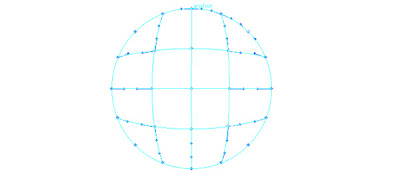
Select all lines and go to Object > Envelope Distort and choose Make with Mesh... from the submenu. Check the preview button to see the mesh before you click OK. To keep things simple and easy to edit I chose for 4 columns (1 for each line) and 2 rows (to have only 1 handle vertically in the center).


Start tweaking the lines mesh shape by dragging on the handles. I've used the Shift key a lot especially for the centered points where they come close together.

Add extra color effect


Next thing I did is duplicating the layer with the lines mesh on top of my original mesh. I click the layer target circle icon on the right in the Layers palette and then I changed the layer mode to Overlay in the Transparency palette. Then I moved the shape a bit until I got an interesting enough result. It depends on the colors you've chosen on what is the best layer mode to choose.

Experiment with the shape


Then I decide to see how things looked in landscape version and I also wondered which effect I would get when using the Warp, Pucker or Bloat tools. I experimented with a very big brush, 400 px to avoid small bumpy effects.

Final result


In the end I decided to go back to my portrait version and for some Warp effects. Last but not least I added some text. First I created a curved path using the Pen tool, then I selected the Type on a Path tool and added my thoughts behind my creation.

read more...

Tuesday, March 9, 2010

Illustrator Tutorial :- How To Use Mesh Tool

An introduction to Gradient Mesh tool

Gradient Mesh tools are used to create a single multicolored object on which colors can flow in different directions , the color transitions achieved are smooth running from one color to another.

Once a mesh object is created you can easily change its color characteristics i.e. shade by adjusting each point of the mesh object . Meshes can be created on any of your vector , eps objects with the exception of compound paths and text objects until expanded.

You can not apply meshes to Jpeg , giff or other raster objects imported to your artwork.

In the following tutorial we will give an introduction to using of mesh tool.

Step1


Creating the Shape

Activate your smart Guides before you start Ctrl+U or view > Smart Guides

Start off by selecting the Ellipse tool(L) and Draw a perfect circle by pressing shift while you create

Illustrator Tutorial :- How To Use Mesh Tool

Step 2

Creating Mesh

select mesh tool and click exactly in the center of the circle your smart guide will help you identify that. this is your first mesh division. Our object is to create a cartoonish face i would like to divide the the circle as a face and will shade two sides as cheeks.


Illustrator Tutorial :- How To Use Mesh Tool

Step 3

Division of the shaded areas.

similarly click and divide the right side and the left side of the circle with clicking on the line running horizontally.


Illustrator Tutorial :- How To Use Mesh Tool

and further divide by clicking similarly on vertical line. The shape of the circle will look something like this.
Illustrator Tutorial :- How To Use Mesh Tool

Switch your tool to direct selection tool (A) and select all the nodes on the outer anchor points of the circle which you can do by keeping shift key pressed. when selected it will look something like this
Illustrator Tutorial :- How To Use Mesh Tool

Step 4

Shading your work

open up your color palette F6 and drag to a light shade of blue you will see the effect changing in your shape


Illustrator Tutorial :- How To Use Mesh Tool

If you miss an anchor point don’t worry just drag the color from your palette and drop over the missed anchor point

here is how it will look like at this point


Illustrator Tutorial :- How To Use Mesh Tool'select the middle anchor points as show below and pick up a shade of pink
Illustrator Tutorial :- How To Use Mesh Tool

Step 5

Creating face elements

As the object over here is to create a face you can easily select any anchor point and using its handles change the direction of the color blending , here a chin is required so i will just play around a little with the lower anchor point in the middle. and shift it down a bit


Illustrator Tutorial :- How To Use Mesh Tool

be careful not to un-blend the perfect blending or your chin will have a cut!

Draw a few face elements.


Illustrator Tutorial :- How To Use Mesh Tool

using similar technique i will draw now eyes. Here are some steps i used to create a set of Cartoonish looking eyes
Illustrator Tutorial :- How To Use Mesh Tool

Place them over your face
Illustrator Tutorial :- How To Use Mesh Tool

here is the finished face you can save it as a symbol and place it over any interesting background . This character was created for a children’s program here is a preview of one of the screen shots of the final scene.

Illustrator Tutorial :- How To Use Mesh Tool


[Via]
read more...

Tuesday, March 2, 2010

Photoshop Brushes - How To Create Cute Faces On Fruits

Step 1 – Open an image of a fruit in Photoshop

Choose File > Open, browse for the image file, then click OK.


Step 2 – Create a new layer

Choose Layer > New Layer to create a new layer. This layer will hold the image of the cute face.


Step 3 – Choose the brush

Make sure that you’ve loaded the brushes into Photoshop. Select the Brush tool then right click anywhere on the document window to see the list of brushes. Pick the face that you’d like to use.


Step 4 – Apply the cute face

Paint the cute face on the fruit. Use the transform tools (Edit > Transform) if you like to distort the face.


Step 5 – Blend the face into the fruits texture

Choose Layer > Layer Style > Blending Options. On the bottom of the window, hold the alt key then drag the white input slider towards the left until the face looks like it is drawn on the fruit. Click Ok when done.


Final Results


[VIA]
read more...

Illustrator - How To Make A Custom Brush

It’s really a lot easier than you would expect. This tutorial was requested by many of my readers after I posted this Free set of 35 Abstract Illustrator Brushes. The possibilities are endless as far as brush making goes in illustrator, but I wanted to get you started in the right direction and let you take it from here. (The purpose is to tease you, so you want to try it on your own!)

Illustrator - How To Make A Custom Brush

It would actually be pretty hard to make this tutorial any more detailed. Making custom Illustrator brushes couldn’t be easier. However, there are a couple things you do need to know first. There are 4 types of brushes that you can create in Illustrator. (Calligraphic, Art, Scatter, and Pattern) I will be showing you how to make an Art Brush. I haven’t explored the other 3 in as much detail, but as soon as I have I will post about it. For now, I will show you how to make an art brush, and you can experiment with the other brush types in the same fashion, the only differences are settings, and how the brushes act when applied.

Make a Custom Illustrator Art Brush:

First, open a new Illustrator document and make any shape that your heart desires. You can literally make ANY shape into a brush, even a square if you feel like it. Here’s what I made. A couple of bars and some blocks scattered about. There is no need to worry about shapes at this point because once you try this a few times, you will get an idea of how the shapes will effect your brush.
Illustrator - How To Make A Custom Brush

Now select all of the shapes that you want to be a brush and in your Brushes palette, click on the little arrow in the upper left, and select “New Brush.”

Illustrator - How To Make A Custom Brush

You will get the option to choose 1 of 4 brush types. Choose “Art Brush” and click OK.
Illustrator - How To Make A Custom Brush

Now you should be in the Brush Options. IMPORTANT: Make sure you select “Tints” as the Colorization Method. This allows you to change the color of the brush as a stroke color. If you don’t select Tints, your brush will always be the color it is when you create it. There are lots of other settings you can play with here, including the direction of the brush stroke. Choose your settings and click OK.
Illustrator - How To Make A Custom Brush

You should now see your new Custom Brush in the Brushes palette.
Illustrator - How To Make A Custom Brush

Now create a shape to test your brush. I used a circle, like below:
Illustrator - How To Make A Custom Brush

Now make sure you have the stroke selected in the tools palette, and click on your Custom Brush in the Brushes palette to apply it to the circle to see what you get:
Illustrator - How To Make A Custom Brush

Custom Brushes are an easy way to get shapes that would have otherwise taken you hours to draw by hand. Now that you have your brush, you can start applying it whenever you want, and adjust the stroke size to get the effect/shapes you want. In the image below, all I did was use the same brush I just created, duplicated it, overlapped it, and adjusted scale, colors and stroke sizes. You can make multiple brushes in order to get way more complex, and the more you try it, the better you get. Seriously, this took about a minute with one brush (made from simple rectangles!). Imagine what you can do if you spend some time experimenting?
Illustrator - How To Make A Custom Brush


[VIA]
read more...

Illustrator - How To Use Live Trace

A reader raised the question why I don’t use the Live Trace instead of tracing the sketch with the Pen tool. It’s simply because the lines of my sketch aren’t ‘clean’ enough to make it work with Live Trace. The outcome depends a lot on your orignal, as you can see here in these experiments. Not that you can’t do magic tricks with this tool, of course you can.

If I traced my pencil drawing first with a thin black marker and scanned this version of the image, it might have been perfect to use Live Trace instead. I simply wanted to show how the Pen tool works and how I draw most of my illustrations, that was the point of the movie.

If you are in the mood for some experimenting with the Live Trace tool then I could give you some info that might help you. In some case (most cases?) you'll get a pretty result already without tweaking too much on the settings. Take for example the picture below. I've just used the 'Photo High Fidelity' Live Trace option which gave this result (in a blink of the eye).

Illustrator - How To Use Live Trace

However if you're after more advanced control on how Live Trace will trace your image then this info can come in handy. After selecting your image you go to Object > Live Trace > Tracing Options. This will popup the Tracing Options windows which gives you the possibility to tweak with the settings. When you click the Preview checkbox you'll see the immediate effect on your image, unchecking it brings back the original image. So you'll need this while experimenting.

Illustrator - How To Use Live Trace

* The lower the number you set in the 'Path Fitting' option the tighter the image will be traced. But make sure it's not too low otherwise you could get a jaggy effect. The higher the number the smoother the effect but you might loose detail in the process. So experiment with this setting.
* The 'Minimum Area' option defines the minimum area that will be traced, which will help to avoid little specs of being traced. For example if you use 12px as minimum area, a 11px or smaller area won't be traced.
* The 'Corner Angle' option sets the sharpness of corner angles. The lower the number, the sharper the corners.

If you go to Object > Live Trace > Expand the image shows the paths and you can still tweak and edit whatever you like, but don't forget to ungroup the object.

read more...

Create Symbols Spray In Adobe Illustrator

Say, you want to draw a tree in full Spring, a very green one. Not just an outline you want details too so that you actually see the leafs. Unless you have a ton of time on your hands or you’re paid by the hour, it would be a hell of a job to draw each leaf one by one. This would be one of the many situations where the Symbol Spaying Tool can be of assistance.

Step 1 - Create a few symbols to spray with

First of all you need to create a few symbols to have a bit of variation to work with. Instead of creating a symbol of only one leaf, I suggest to draw groups of leaves and make them separate symbols. To do this, just select the group of leaves and drag & drop them in the Symbols palette. I've used different shades of green for my leafs.


Step 2 - Set the Symbol Sprayer Tool

The second step is to double click the Symbol Sprayer Tool in the Toolbox and adjust the settings to your wishes. This can be a bit tricky and you might need to experiment a bit to find the setting that fits your purpose. I've used an intensity of 7 and a Symbol Set Density of 5. Furthermore I've changed all dropdown menus to "User Defined".


Step 3 - Let the fun begin and spray like you've never sprayed before

Once you've discovered the desired setting you can start spraying around. Oh and you don't have to worry about damaging the ozone layer here, you can spray like a madman :) Just click and drag, release the mouse when you think that there are enough leaves. I usually deselect each time I've released the mouse. This way you have all separate sprayings, so you can move them around and rearrange them a bit if needed.


Don't stop experimenting

If you're still not satisfied with the result, you can also tweak a bit by using the Symbol Shifter, Cruncher, Sizer, Spinner, Stainer, Screener or Styler Tool. These tools are hidden under the Symbol Sprayer Tool when you select and hold down the mouse. Think about the possibilities here in this tool and the amount of time you can save: a field full of flowers, a sky full of birds,... Ah Spring, can't wait till it's here. The weather forecast isn't looking that bad for this week.

Hope you enjoyed this tutorial.


[VIA]


read more...