Step 1
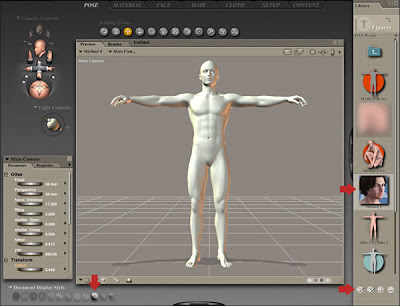
Launch Poser, select the default figure in the main viewport and hit delete. Go to Library > Figures > Daz People > Michael 4, highlight the thumbnail and click the Create New Figure tick at the foot of the palette to load the model. At this stage were not concerned with textures, so select Smooth Shaded under Document Display Style.
Step 2
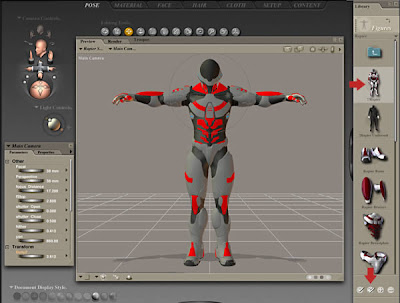
Select the Coalition Rapier library (found under Figures > Mestophales > Coalition > Rapier). Select the top Rapier icon and click the Create New Figure double-tick icon. Ensure the suit is selected, then choose Figure > Conform To and select Michael 4 in the following window to make the suit follow the figures movements.
Step 3
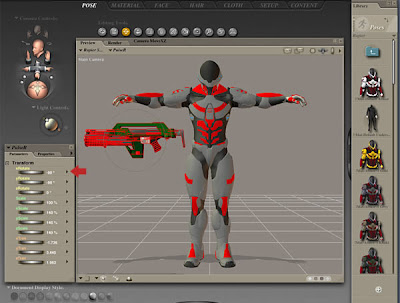
With the suit still selected, choose Pose > Mestophales > Coalition > Rapier and highlight the Mat-Armor-1 Olive thumbnail, then click the Apply Library Preset tick. Now to add the weapon. I found this pulse rifle in old library, but you can easily use something similar from DAZ3D such as these sci-fi rifles.
Load the weapon, mine is not a Smart Prop, so I had to use the Transform Parameter dials to rotate and position it just below the figures right arm.
Step 4
Select Four Ports from the bottom-left pull-down menu and use the Camera Controls to access the best position/angle to view the right hand and weapon. Now fine-tune the Transform Parameter dials to accurately position the weapon.
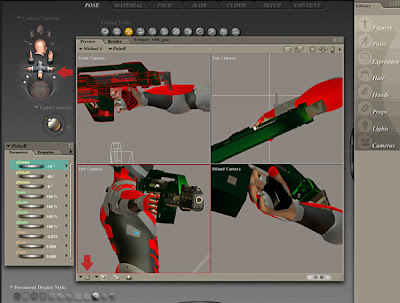
Step 5
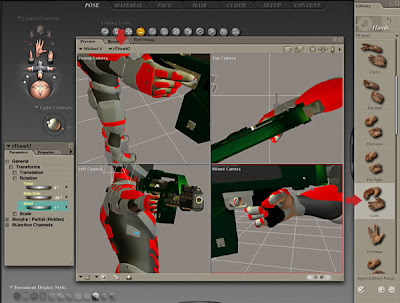
Select Michael’s right hand and apply the Grab preset pose (Library > Hands > P6 Male). Now select each individual finger/thumb mesh in turn and adjust them to grasp the trigger and handle.
Read More
Tags:

0 comments: on "Creating a Stunning Sci-fi Illustration Using Photoshop and Poser"
Post a Comment